
console table plans pdf
A Console Table Plans PDF is a detailed guide offering step-by-step instructions, diagrams, and material lists for crafting stylish and functional tables at home with ease.
1.1 What is a Console Table Plans PDF?
A Console Table Plans PDF is a comprehensive guide providing detailed instructions, diagrams, and material lists for crafting console tables. It includes step-by-step assembly directions, tool requirements, and design options, making it ideal for both beginners and experienced woodworkers. The PDF format ensures easy accessibility and printing, allowing users to follow along seamlessly during their project.
1.2 Importance of Using a Console Table Plan
Using a console table plan ensures accuracy and efficiency in your project. It provides clear step-by-step instructions, diagrams, and material lists, helping you achieve professional results. A well-structured plan saves time, reduces errors, and guarantees a polished finish. Ideal for both beginners and experienced woodworkers, it offers a seamless guide to crafting a durable and stylish console table that meets your needs and enhances your home decor.
Benefits of Building a Console Table
Building a console table enhances home decor, provides functional storage, and offers a sense of accomplishment through DIY creation, perfect for entryways or hallways.
2.1 Customization Options
Console table plans PDFs offer extensive customization options, allowing users to tailor designs to their preferences. Choose from various styles, such as rustic, farmhouse, or modern, and modify dimensions to fit specific spaces. Materials can be selected based on durability and aesthetics, while decorative elements like carvings or paint enhance personalization. These plans empower creators to craft unique pieces that reflect their style and complement home decor effortlessly.
2.2 Cost-Effectiveness
Building a console table using a PDF plan is budget-friendly. With an estimated cost of $50, you can create a stunning piece using affordable materials. DIY projects save money compared to buying pre-made furniture, allowing you to invest in quality materials while staying within budget. Plus, reusable tools like a miter saw or drill can be used for future projects, adding long-term value to your workshop.
2.3 Skill Development for Beginners
Building a console table is an excellent way for beginners to enhance woodworking skills. It introduces basic techniques like measuring, cutting, and assembling. Working with tools such as miter saws and drills improves precision and confidence. The project teaches foundational skills in carpentry, allowing newcomers to gradually tackle more complex designs while gaining hands-on experience and a sense of accomplishment.
Choosing the Right Console Table Plan
Choosing the right console table plan requires considering style, skill level, and budget. Select plans that match your space, tools, and material availability for optimal results.
3.1 Factors to Consider
When selecting a console table plan, consider the space where it will be placed, ensuring measurements fit perfectly. Style and design should match your home decor. Choose materials that align with your budget and durability needs. Skill level is crucial—opt for plans that suit your woodworking experience. Tools and time required should also be evaluated to ensure the project is feasible for you.
3.2 Popular Console Table Styles
Popular console table styles include Rustic, Farmhouse, and Modern designs. Rustic styles feature natural wood finishes and distressed details, while Farmhouse tables emphasize simplicity and durability. Modern designs offer sleek, minimalist aesthetics with clean lines. These styles cater to various home decors, providing both functionality and visual appeal. Each style is detailed in console table plans PDFs, ensuring builders can recreate their desired look with precision.

Materials and Tools Required
Essential materials include wood planks, screws, and Sanding paper. Tools needed are a Miter Saw, Drill/Driver, Jigsaw, and Kreg Pocket Hole Jig for precise assembly.
4.1 List of Materials
Essential materials include 2×2 lumber for legs, 2×4 boards for supports, 3/4″ plywood for the table top, and MDF for a smooth finish. Additional items are wood screws, wood glue, and finishing nails. Sandpaper is needed for smoothing surfaces, while optional decorative elements like trim or paint can enhance the design. Ensure all materials are measured and cut according to the plan specifications for accuracy.
4.2 Essential Tools for the Project
To build a console table, essential tools include a Keg Pocket Hole Jig, Drill/Driver, Miter Saw, Jigsaw, and Sandpaper. These tools ensure precise cuts, smooth assembly, and a polished finish.

Step-by-Step Instructions
Start by preparing materials, then cut wood according to plans. Assemble the legs and base, followed by attaching the table top. Sand, paint, and add finishes.
5.1 Preparing the Materials
Begin by gathering all materials, including wood planks, screws, and hardware. Use a miter saw to cut lumber to specified lengths. Sand all pieces to ensure smooth surfaces. Organize tools like drills, jigsaws, and pocket hole jigs. Double-check measurements to avoid errors. Separate materials for legs, tabletop, and shelves, labeling each for easy reference during assembly.
- Tools Needed: Drill, miter saw, jigsaw, pocket hole jig.
- Materials: Wood, screws, wood glue, sandpaper.
5.2 Assembling the Table
Assembling the table involves aligning the legs and base, then securing them with screws. Attach the table top using wood glue and clamps, ensuring a sturdy frame. Use a miter saw for precise cuts and a drill for smooth drilling. Sand all edges for safety and a polished look. Follow the PDF instructions for exact measurements and alignment to achieve professional results.
Design Variations
Explore rustic, farmhouse, and modern console table designs, each offering unique styling options to suit various home décors and personal preferences, ensuring a perfect fit for any space.
6.1 Rustic Console Table
A rustic console table adds warmth and charm to any space. Typically crafted from natural wood, it features distressed finishes and simple designs. The plans often include dimensions like 54 inches long, 16.5 inches wide, and 31.5 inches tall, perfect for entryways or living rooms. Detailed PDF guides provide step-by-step instructions, tool lists, and material specs for a DIY project that blends simplicity with timeless style.
6.2 Farmhouse Style Console Table
The Farmhouse Style Console Table features a rustic yet elegant design, blending classic charm with modern functionality. Measuring 54″ long, 16.5″ wide, and 31.5″ tall, it offers ample space for decor or storage. Built with durable materials, it combines distressed finishes and clean lines for a timeless appeal. Step-by-step plans guide beginners through construction, requiring basic tools like miter saws and jigsaws. Perfect for entryways or living areas, it adds a cozy, welcoming touch to any home.
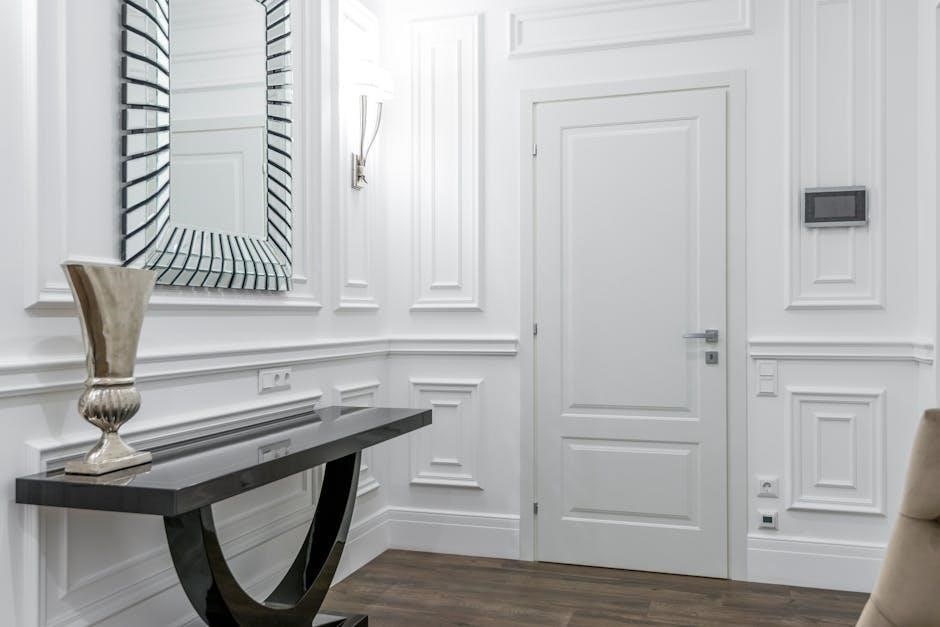
6.3 Modern Console Table
A modern console table features sleek, minimalist designs with clean lines and innovative materials. Often incorporating metal, glass, or reclaimed wood, these tables offer a contemporary aesthetic. The PDF plans provide detailed instructions for creating a sophisticated look, including precise measurements and assembly tips. Perfect for urban spaces, modern console tables blend functionality with style, making them a versatile addition to any room.
Assembly Instructions
Attach legs to the base, align the frame, and secure the tabletop. Follow diagrams for proper alignment and tightening to ensure stability and a professional finish.
7.1 Legs and Base Assembly
Begin by attaching the legs to the base using wood screws. Ensure proper alignment and stability. Use clamps to hold pieces in place while drilling pilot holes. Secure the legs tightly to avoid wobbling. Apply wood glue for added strength. Double-check measurements and alignment before tightening all screws. A level tool is essential for ensuring the base is even and stable. This step is crucial for the table’s overall durability and balance.
7.2 Table Top Construction
Constructing the table top involves aligning and securing the planks together using wood glue and clamps. Sand the surface for a smooth finish, then drill pilot holes for screws. Attach the top to the base using pocket hole joinery or wood screws. Ensure proper alignment and tighten securely. The PDF provides detailed diagrams and cut lists for accurate measurements and professional results.
Finishing Touches
Finishing touches involve sanding, painting, or staining to enhance the table’s appearance. Adding decorative elements like hardware or carvings can elevate its aesthetic appeal and durability.
8.1 Sanding and Painting
Start by sanding the console table with coarse-grit sandpaper, progressing to finer grits for a smooth finish. Remove dust thoroughly before applying primer or paint. Use water-based paints for durability, applying thin, even coats with adequate drying time between layers. Consider a clear sealant for protection and a polished look. Ensure proper ventilation and follow safety guidelines when painting.
8.2 Adding Decorative Elements
Add a personal touch to your console table with decorative elements like carvings, metal accents, or painted designs. Consider distressing for a rustic look or applying moldings for a classic feel. Use decorative hardware or add intricate details to enhance the table’s style. Ensure the elements align with the overall design to maintain a cohesive aesthetic. Finishing with a protective coat will preserve the beauty of your craftsmanship;

Budget and Cost Estimation
Budgeting for a console table typically ranges from $50 to $200, depending on materials and tools. Using reclaimed wood and precise planning can help reduce costs effectively.
9.1 Estimated Cost Breakdown
The estimated cost to build a console table ranges from $50 to $100, depending on materials. Lumber and hardware typically cost $40-$60, while screws, finishes, and decorative elements add $10-$20. Tools like a Kreg Pocket Hole Jig or miter saw may be needed, but these are often reusable. PDF plans are usually free or low-cost, making this project budget-friendly for DIY enthusiasts.
9.2 Tips for Reducing Costs
To minimize expenses, consider using reclaimed or affordable wood types. Buy materials in bulk and repurpose leftover supplies. Opt for basic tools instead of specialized ones, and shop during sales or discounts. DIY finishing touches like painting or staining can also lower costs compared to hiring professionals.
Troubleshooting Common Issues
Addressing alignment problems and wobbling, ensure legs are level and secure. Use shims for uneven surfaces and double-check measurements for stability and proper fit.
10.1 Common Mistakes to Avoid
- Not pre-drilling holes, which can cause wood splitting during assembly.
- Ignoring proper clamping techniques, leading to uneven bonding.
- Overlooking the importance of sanding before finishing.
- Using incorrect screws or hardware, compromising durability.
- Not verifying the table’s level, resulting in an uneven surface.
10.2 Solutions for Alignment Problems
For alignment issues, use clamps to hold parts in place while drilling or screwing. Check measurements with a carpenter’s square and ensure legs are evenly spaced. Dry-fit all components before final assembly to identify and adjust misalignments. Use shims or adjust foot pads for uneven surfaces. Double-check cut lists and diagrams for accuracy to prevent costly mistakes during assembly.
Building a console table using a PDF plan offers a rewarding DIY experience, allowing customization and cost savings while creating a functional and stylish piece for your home.
11.1 Summary of the Project
Building a console table using a PDF plan is a rewarding DIY project that combines creativity with practicality. The process involves selecting a design, gathering materials, and following step-by-step instructions to create a functional and stylish piece of furniture. Whether you prefer rustic, farmhouse, or modern styles, console table plans offer clear guidance for beginners and experienced woodworkers alike, ensuring a successful and satisfying outcome.
11.2 Final Tips for Success
For a successful project, measure carefully and follow plans precisely. Use proper tools like a Kreg Pocket Hole Jig for sturdy joints. Sand thoroughly before finishing. Apply paint or stain evenly, allowing ample drying time. Attach decorative elements last for a polished look. Double-check alignment to avoid unevenness. Start with a simple design if you’re a beginner.
Additional Resources
Explore online communities and download recommended PDF plans. Websites like Woodcraft and Ana White offer detailed designs and expert tips for your console table projects.
- Woodcraft Plans
- Ana White Designs
12.1 Recommended PDF Plans
Check out detailed Console Table Plans PDFs offering step-by-step guides, diagrams, and material lists. Popular options include Farmhouse and Rustic styles, with exploded drawings and cut lists. Many plans are free or low-cost, catering to all skill levels. They often include tool lists and assembly instructions, ensuring a smooth building process. These resources are ideal for DIY enthusiasts seeking clear, actionable projects.
12.2 Online Communities for Support
Engage with online forums and DIY communities for guidance and feedback on your console table project. Platforms like Reddit, Facebook groups, and specialized woodworking forums offer valuable advice, troubleshooting tips, and inspiration from experienced crafters. These communities are great for sharing progress, learning from others, and refining your skills, ensuring your project turns out perfectly.